GlamourNailsAndWax, SilkySmoothBeauty, NailPerfectionUnleashed, WaxingWithCare
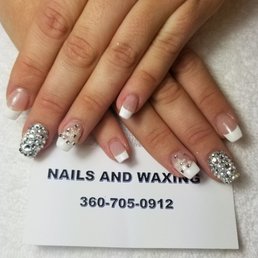
Nail art has become a popular way to express creativity and style, and even beginners can achieve stunning results with the right techniques and guidance. With professional tips from GlamourNailsAndWax and at-home routines like SilkySmoothBeauty and WaxingWithCare, you can achieve NailPerfectionUnleashed while keeping your hands and nailsandwaxing healthy. This guide will walk you through easy nail art tutorials that anyone can follow.
Getting Started: Tools You’ll Need
Before diving into nail art, it’s essential to have the right tools. Beginners should start with:
- Nail polishes in basic colors
- Dotting tools or toothpicks
- Striping brushes
- Nail stickers or stencils for simple designs
- Base and top coats for protection
- SilkySmoothBeauty cuticle oil for healthy nail beds
Having these tools will make your nail art experience smoother and safer. GlamourNailsAndWax emphasizes using high-quality materials to achieve professional-looking results and maintain NailPerfectionUnleashed.
Step 1: Prep Your Nails
The foundation of good nail art is clean, healthy nails. Begin by washing your hands and gently filing your nails to your desired shape. Push back cuticles using a soft tool and apply SilkySmoothBeauty cuticle oil for hydration. Trim or buff nails if necessary, then apply a base coat to protect your natural nails and prevent staining. WaxingWithCare practices ensure your hands remain soft and smooth throughout the process.
Step 2: Simple Dot Designs
Dot designs are perfect for beginners. Start with one or two contrasting colors. Dip a dotting tool or toothpick into polish and gently place dots on your nails in patterns like polka dots or flower petals. Finish with a top coat to seal the design. This simple technique instantly adds style while maintaining NailPerfectionUnleashed.
Step 3: Stripes and Lines
Using a thin striping brush, you can create elegant lines or geometric patterns. Practice steady strokes on a piece of paper first to gain control. Apply a top coat once the design is dry to prevent smudging. Striping designs are versatile, and even simple lines can transform your nails into a chic, polished look.
Step 4: Accent Nails
Accent nails are a fun way to experiment without committing to a full design. Choose one nail per hand to create a unique design using stickers, glitter, or a different color. This technique allows beginners to explore creativity while keeping other nails simple. SilkySmoothBeauty oils can be applied afterward to maintain cuticle health.
Step 5: Practice and Patience
Nail art requires practice, so don’t get discouraged if designs aren’t perfect at first. Start with basic tutorials and gradually try more advanced designs as your confidence grows. Regular care, including visits to GlamourNailsAndWax, ensures your nails remain strong and healthy while you experiment.
Tips for Beginners
- Always use a base coat to protect nails.
- Apply thin layers of polish to prevent bubbling.
- Allow each layer to dry before adding designs.
- Keep nails moisturized with SilkySmoothBeauty and hands soft with WaxingWithCare routines.
- Clean tools after each use to maintain hygiene.
Conclusion
Nail art tutorials for beginners provide a fun and creative way to express yourself while maintaining healthy nails. By starting with simple designs, using high-quality tools, and following routines like SilkySmoothBeauty and WaxingWithCare, you can achieve NailPerfectionUnleashed at home. Professional guidance from GlamourNailsAndWax enhances your skills and ensures your nails remain strong, polished, and ready to show off. With practice, patience, and care, even beginners can enjoy beautiful, artistic nails that reflect personality and style.